Introduction
API provides an application pluggable interface for integration by front-end apps. They have become prominent in modern-day programming principles. As technology continues to evolve, industry application flow continues to adjust as well. Today, we will discuss and show how easy it is to add OpenApi using Swaggerfox into your Spring Boot application.
What is Swagger/OpenApi
Swagger (now referred to as OpenAPI) is a set of specifications for building and documenting RESTful APIs. It provides a standard format for describing RESTful APIs in a machine-readable format, making it easier for developers to develop, test, and document APIs.
OpenAPI is designed to be language-agnostic, meaning that it can be used with APIs built using any programming language. Thus, providing a write once, use everywhere approach. It provides a way to define endpoints, request and response parameters, and API operations. This information can be used to generate documentation, client SDKs, and server stubs.
OpenAPI is composed of two parts: a YAML or JSON specification document that defines the API, and a set of tools that can be used to generate documentation, code, and test suites based on that specification. The specification document describes the endpoints, methods, requests, response payloads, and authentication methods used by the API.
OpenAPI is widely used in the development of RESTful APIs and is supported by a large number of tools and frameworks, including Spring Boot, Node.js, Asp.Net, and many others.
Getting Started
To use Swagger in our application, we have to add the following dependencies in our pom.xml file.
- Spring Boot 2.7 and above
- Java 1.8 and above
- Springfox Swagger2 v2.7.0
- Springfox Swagger-ui v2.7.0
- Springdoc OpenApi-ui v1.5.12
What our pom.xml file looks like is shown in the code image below:
                <dependency>
			<groupId>io.springfox</groupId>
			<artifactId>springfox-swagger2</artifactId>
			<version>2.7.0</version>
		</dependency>

		<dependency>
			<groupId>io.springfox</groupId>
			<artifactId>springfox-swagger-ui</artifactId>
			<version>2.7.0</version>
		</dependency>
		<dependency>
			<groupId>org.springdoc</groupId>
			<artifactId>springdoc-openapi-ui</artifactId>
			<version>1.5.12</version>
		</dependency>
Creating the configuration class
This class is used to introduce Swagger into our application. It consists of code blocks that will activate the various endpoints in our Controller class.
package com.valerio.nu.springdatajpa.config;

import org.springframework.context.annotation.Bean;
import org.springframework.context.annotation.Configuration;
import org.springframework.web.servlet.config.annotation.ResourceHandlerRegistry;
import springfox.documentation.builders.ApiInfoBuilder;
import springfox.documentation.builders.PathSelectors;
import springfox.documentation.builders.RequestHandlerSelectors;
import springfox.documentation.service.ApiInfo;
import springfox.documentation.spi.DocumentationType;
import springfox.documentation.spring.web.plugins.Docket;
import springfox.documentation.swagger2.annotations.EnableSwagger2;
@Configuration
public class SwaggerConfig {


    @Bean
    public Docket api() {
        return new Docket(DocumentationType.SWAGGER_2)
                .select()
                .apis(RequestHandlerSelectors.any())
                .paths(PathSelectors.any())
                .build();
    }

    private ApiInfo apiInfo() {
        return new ApiInfoBuilder()
                .title("User Management API")
                .description("API documentation")
                .version("1.0.0")
                .build();
    }
}
From the code block above, we that a Docket bean was called, and its select() method returns an instance of ApiSelectorBuilder, which gives us access to control the endpoints exposed by Swagger. Further configuration includes the RequestHandler, helping us to determine the path selection by applying the RequestHandlerSelectors and PathSelectors. Using the any() function, we are able to scan through our endpoints, making swagger able to present our endpoints.
The Controller and other annotations
The endpoints are found in our controller class alongside annotations that detail what each endpoint is doing. The code below presents our controller class. The @Api annotation on the controller class and @ApiOperation annotation on the controller methods provide additional information about the API that Swagger will use to generate documentation.
package com.valerio.nu.springdatajpa.controller;

import com.valerio.nu.springdatajpa.model.User;
import com.valerio.nu.springdatajpa.service.SimpleUserImpl;
import com.valerio.nu.springdatajpa.service.UserRepository;
import io.swagger.annotations.Api;
import io.swagger.annotations.ApiOperation;
import org.hibernate.ObjectNotFoundException;
import org.springframework.hateoas.EntityModel;
import org.springframework.hateoas.Link;
import org.springframework.hateoas.server.mvc.WebMvcLinkBuilder;
import org.springframework.http.HttpEntity;
import org.springframework.http.HttpStatus;
import org.springframework.http.ResponseEntity;
import org.springframework.web.bind.annotation.*;
import static org.springframework.hateoas.server.mvc.WebMvcLinkBuilder.*;
import java.util.List;


@CrossOrigin
@RestController
@RequestMapping("/api")
@Api(value = "User Controller")
public class UserController {
    private final SimpleUserImpl userService;

    public UserController(SimpleUserImpl userService, UserRepository userRepository) {
        this.userService = userService;
    }

    // Add
    @PostMapping(value = "/users")
    @ApiOperation(value = "Create a user")
    public User Post(@RequestBody User params) {
        return userService.Post(params);
    }


    // Get
    @GetMapping(value = "/users")
    @ApiOperation(value = "Get all Users")
    public List<User> Get() {

        return userService.Get();
    }

    // Get By ID
    @GetMapping(value = "/users/{id}")
    @ApiOperation(value = "Get  a user")
    public EntityModel<User> Get(@PathVariable int id) {


        User result = userService.Get(id);
                if(result == null){
                    throw new ObjectNotFoundException("no user exist with such id: " ,  String.valueOf(id));
                }

            return EntityModel.of(result, //
                    WebMvcLinkBuilder.linkTo(WebMvcLinkBuilder.methodOn(this.getClass()).Get(id)).withSelfRel(),
                    WebMvcLinkBuilder.linkTo(WebMvcLinkBuilder.methodOn(this.getClass()).Get()).withRel("all-users"));


    }


    // Update
    @PutMapping(value = "/users/{id}")
    @ApiOperation(value = "Update a user")
    public User Update(@PathVariable int id, @RequestBody User params) {
        return userService.Update(params, id);
    }

    // Delete
    @DeleteMapping(value = "/users/{id}")
    @ApiOperation(value = "Delete a user")
    public String Delete(@PathVariable int id) {
        return userService.Delete(id);
    }

}
Conclusion
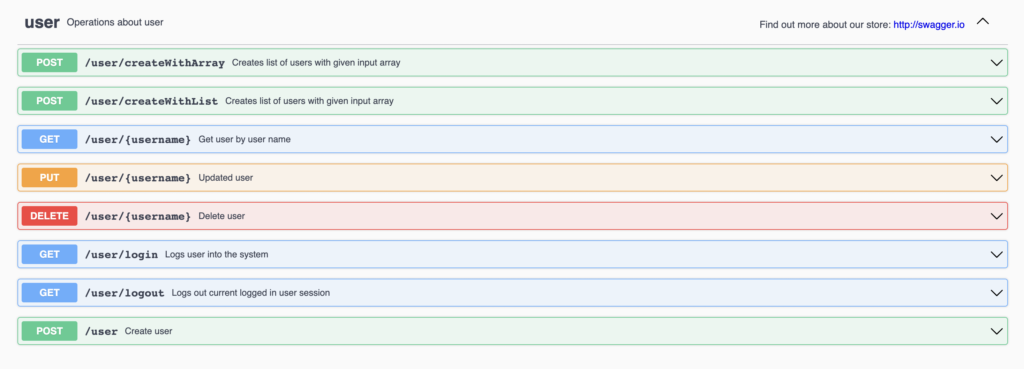
We have presented a simple way to document Restful API using Swagger/OpenApi in this tutorial. The application endpoints can be accessed using the localhost address (http://localhost:8080/swagger-ui/index.html). Essentially, the code for this tutorial can be found on our GitHub page.